Adding meta-qt5 layer and building a simple application that is run on boot.
First the examples, then a simple application
Switch to systemd?
This is part 5 of the QEMU Board Emulation post series.
In the previous post I showed how to use Yocto to build an image for Vexpress-A9 board. Yocto allows us to build a custom distribution and to streamline bootloader and kernel cross-compilation and handling.
In the Linux device driver development post series I showed custom memory-mapped and I2C devices for QEMU, and device driver and userspace application development for those devices. The userspace applications that were presented are usable from command line only, to demonstrate the desired functionality.
In real embedded systems, the use of non-GUI (command line only) applications is enough if the unit has no display. In that case data can be published to the outside world over some interface (usually network interface). We will cover this in some of the future posts.
However, there are a lot of cases where the embedded system has a display, and in that case the userspace application should provide graphical interface. There are different libraries that enable graphical interface to be shown, but in this post we will use Qt, version 6. We will integrate it into Yocto development using the meta-qt6 layer.
Items that will be covered in this post are
Sources for the Yocto build environment for Vexpress-A9 can be found in following repositories:
- https://github.com/straxy/qemu-vexpress-yocto - base repository used to initialize Yocto environment -
kirkstonebranch - https://github.com/straxy/meta-vexpress -
meta-vexpresslayer containing distro, machine and images configuration, as well as recipes for bootloader and linux kernel -kirkstonebranch
Qt6 application development
The application is developed in Qt6, using combination of C++ and QML. Qt provides many classes which provide different functionality and simplify development.
One of the most interesting features are the signals and slots mechanism, where asynchronous communication between threads of execution is provided with loose coupling. One class can provide a slot function, essentially a callback, and another class can provide a signal function, and then signal and slot have to be connected. Once signal is emitted, the slot function is called.
We will go into more details soon, and the source code of the developed application can be found in the qt6-sens-app github repository.
Ideas
The goal of this application is to provide graphical interface towards the custom memory-mapped and I2C QEMU devices developed in the Linux device driver development post series.
The user interface should be simple, one part showing items related to the memory-mapped sensor and the other part showing items related to the I2C sensor, thus combining functionalities provided by mmsens-app and i2csens-app.
I will try to reuse most of the functionalities from the existing classes, but updating them to use Qt-specific types (like QString instead of std::string). The biggest change for the existing implemented classes will be that they will inherit from QObject in order to be able to use the signals and slots functionality.
Handling memory-mapped sensor
The mmsens-app has a separate thread where poll syscall is used to block thread execution until sysfs_notify is executed on the interrupt sysfs attribute.
In this case, Qt6 provides the QFileSystemWatcher class which provides similar functionality: the QFileSystemWatcher can be configured to track a state of a certain file until notify event is received, and then can emit the fileChanged signal, when read of data register can be performed.
This way we can just set up correct signals and slots and we don't need to create additional explicit thread.
As for the contol, we should be able to
- enable memory-mappped sensor and interrupt generation
- select sampling frequency
- present last read value
Handling I2C sensor
The i2csens-app has a separate thread which blocks until timeout period expires, and then reads the TEMPERATURE register.
Using Qt we can use the QTimer class. In this case, when QTimer expires it emits the timeout signal, so we can use that to trigger read.
Again, we can only set up correct signals and slots and we don't need to create additional explicit thread.
As for the contol, we should be able to
- enable I2C sensor
- show last read I2C value
In this case, since the value is 'temperature', we will use line chart to show last 10 measured values.
QML interaction
QML is used for frontend and C++ for backend implementation. They need to interact and exchange data, and there are multiple ways to do it.
In this case I wanted to make a loose coupling between QML and C++, so I just used signals/slots mechanism for exchanging data between QML and C++.
This is a simple application, so using only signals/slots was possible. In more complex situations some other mechanism presented in the link above may have to be used in order to provide full functionality.
Implemented GUI is shown in the following picture

Application design
The class organization is presented in the following picture. Manager class represents glue between QML and C++ classes, routing signals in both directions.
Poller class implements functionality related to the memory-mapped sensor, while I2CHandler class implements functionality related to the I2C sensor.

An example interaction for memory-mapped sensor and I2C sensor are shown in the following pictures.


Using meta-qt6 Yocto layer
In order to simplify cross-compilation we will use Yocto. The meta-qt6 layer provides all needed dependencies.
However, before the layer could be added to the bblayers.conf file, we need to update Yocto to kirkstone version to be compatible with the meta-qt6 layer version 6.4.
Upgrading Yocto to kirkstone
Considering we have only few recipes in the meta-vexpress and meta-vexpress-apps repositories, the upgrade process mostly consisted in updating the layer specification in layer.conf to add kirkstone as supported version, and in updating append/prepend/overrides to use : instead of _ as separator (change that happened in honister).
Adding new layer
After we have updated Yocto to kirkstone, we can add the layer just by updating bblayers.conf with the following line
${TOPDIR}/../sources/meta-qt6 \
Adding qt6-sens-app recipe
The recipe for the qt6-sens-app is similar to the ones used for other userspace applications.
Main difference are the Qt-related items
inherit qt6-cmake

DEPENDS += " qtbase qtdeclarative qtdeclarative-native "
RDEPENDS:${PN} += " qtcharts-qmlplugins ttf-dejavu-sans "
The qtbase and qtdeclarative provide base Qt C++ and QML support. Since we are using QtCharts (QML version) we also need to add qtcharts-qmlplugins.
Base image does not have fonts installed, so I added
ttf-dejavu-sansto be able to render text.
Testing
Building and running application
The Yocto image is built using the following command
# framebuffer image build command
$ DISTRO=mistra-framebuffer MACHINE=vexpress-qemu bitbake mistra-image
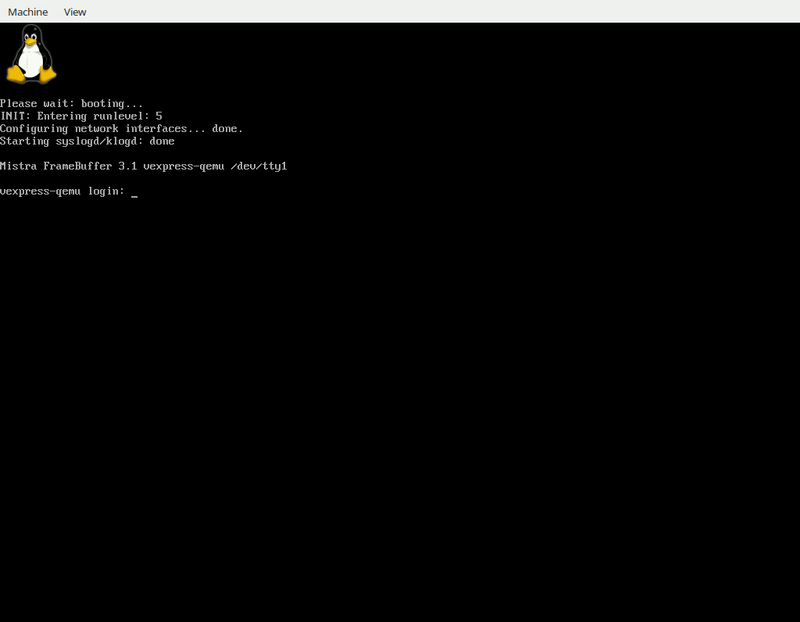
After image is built, copied to the SD card and QEMU is run, the following output will be visible
# QEMU output
$ qemu-system-arm -M vexpress-a9 -m 1G -kernel u-boot.elf \
                  -drive file=sd.img,format=raw,if=sd \
                  -net nic -net tap,ifname=qemu-tap0,script=no \
                  -serial mon:stdio
[ ... ]
Mistra FrameBuffer 4.0 vexpress-qemu /dev/ttyAMA0
vexpress-qemu login:
The application can be started using
$ qt6-sens-app
The application UI will be shown and we can interact with it.
Simple testing scenario that demonstrates application functionality is shown in the following image

Summary
In this blog post the Yocto image is extended with Qt6 functionality. A new application for interaction with custom memory-mapped and I2C sensor is implemented and it's functionality demonstrated.